Table of Contents
Introduction
If you’re looking for a delicious snack that’s perfect for busy families, Gluten-Free Granola Bars are about to become your new favorite go-to. These bars are not just a healthy option for breakfast or after-school treats—they’re packed with simple, honest ingredients and lots of love. Whether you need a quick bite on the way to work or want a portable snack for your kids, gluten-free granola bars deliver flavor and nourishment in every bite. In this article, you’ll discover my favorite homemade gluten-free granola bar recipe, why it’s the ultimate family-friendly snack, and a bit of the heartwarming story behind it.
The Story Behind My Gluten-Free Granola Bars
Childhood Memories Meet Family Life in NYC
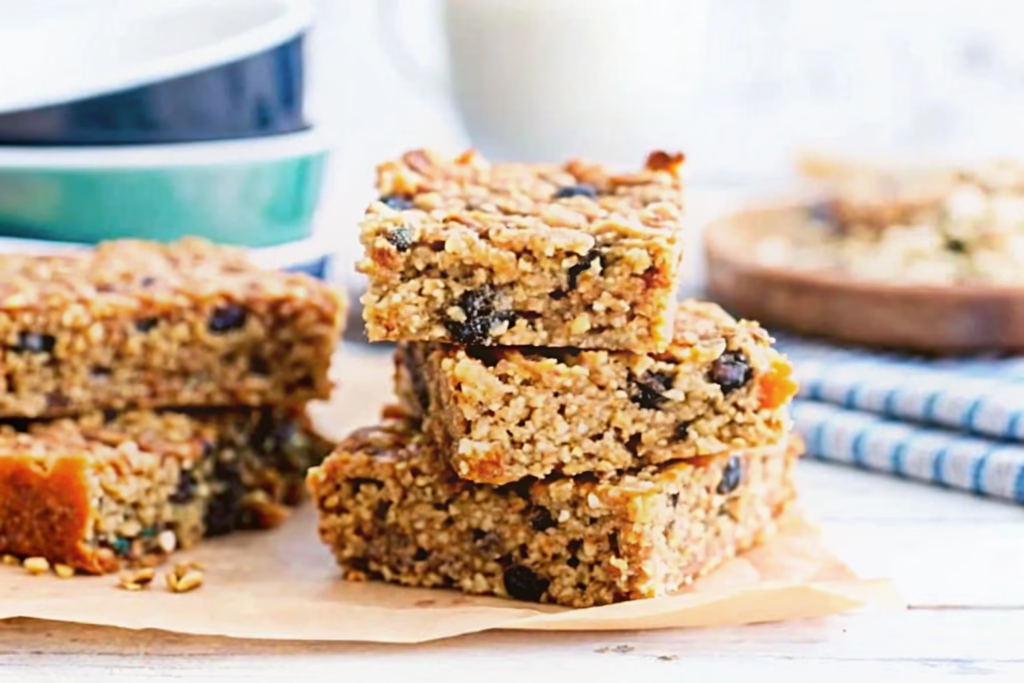
The story of my gluten-free granola bars starts in a sunlit kitchen on the Greek island of Kalymnos, where I first fell in love with the simple act of making snacks from scratch. I remember my Yiayia’s hands working quickly, blending oats and honey, filling the house with the warm aroma of toasting nuts and dried fruit. Fast forward to life in bustling New York City, and those memories have traveled with me—right into the tiny but lively kitchen I now share with my Polish husband, Marek, our creative daughter Emily, and my mother Elizabeth.
Our weekday mornings can be a frenzy, but one thing that always grounds us is a homemade gluten-free granola bar tucked into a lunchbox or grabbed on the way out the door. These bars connect the old and the new: the Mediterranean flavors of my childhood and the multicultural energy of our NYC home. For me, making gluten-free granola bars is a ritual, a way to offer my family a nourishing snack that feels like a small act of love.
What Makes These Gluten-Free Granola Bars Special
When you’re baking for a family with different needs—like keeping everything gluten-free for Elizabeth, who has celiac—finding the right recipe can be a challenge. That’s why I kept experimenting until I landed on a blend that’s chewy, crisp, and just the right amount of sweet, with no gluten and no fuss. The secret? Rolled gluten-free oats, a mix of seeds and nuts, and just enough natural sweetener to hold everything together.
Unlike store-bought bars, these gluten-free granola bars are made without preservatives, artificial flavors, or fillers. Every ingredient is something you recognize—and probably already have in your pantry. It’s a snack you can feel good about feeding your kids, and even better when you see them reaching for seconds. Emily loves to help press the mixture into the pan, and sometimes the stuffed animals supervise from the counter. This recipe isn’t about perfection—it’s about togetherness, memories, and a treat you’ll want to make again and again.
The Art of Making Gluten-Free Granola Bars at Home
Gathering Your Gluten-Free Pantry Staples
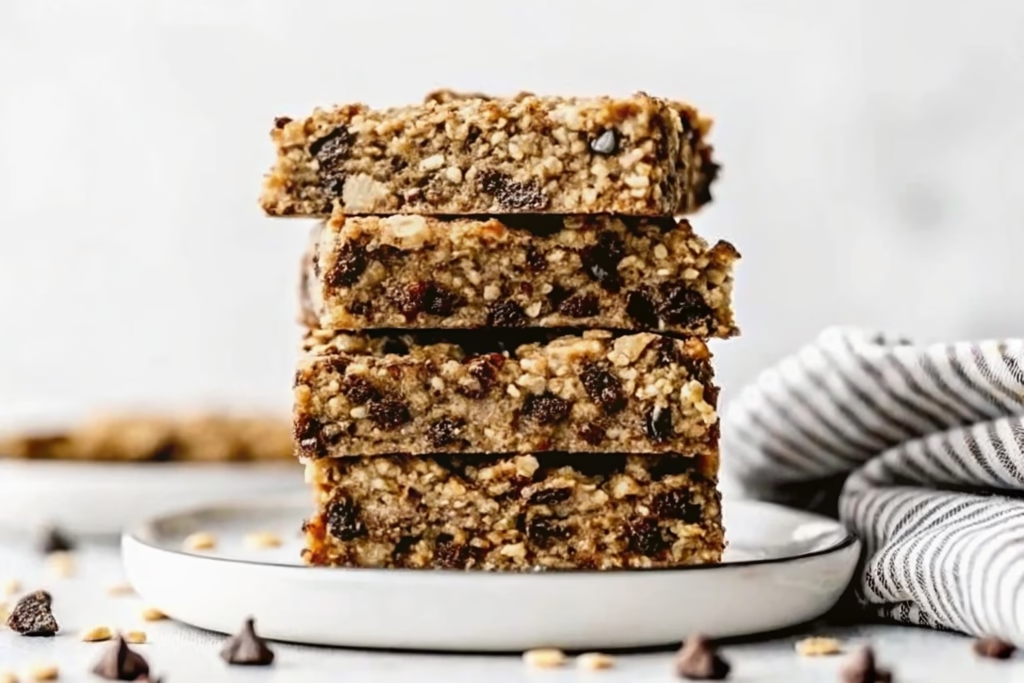
The secret to the best gluten-free granola bars is choosing quality, safe ingredients. In my kitchen, everything starts with certified gluten-free oats. This is a must, especially if you’re making these for anyone with celiac disease or gluten intolerance. Next come the mix-ins—raw sunflower seeds, slivered almonds, or even pumpkin seeds all add crunch and nutrition. Unsweetened coconut flakes and a handful of dried fruit, like cranberries or raisins, make every bite satisfying. A dash of cinnamon or a little vanilla extract creates that bakery-fresh aroma as the bars bake.
Sweeteners play an important role, too. Honey or pure maple syrup both help the bars stick together while adding a gentle sweetness. Nut butters like peanut, almond, or sunflower seed butter give a chewy, rich texture and an extra boost of protein. What’s beautiful about making gluten-free granola bars at home is the flexibility—you get to decide every single ingredient, so there’s no guessing about allergens or mystery additives. If your family prefers cashews over almonds or you want to use chopped dates instead of cranberries, you’re free to do so. When you’re the one mixing the bowl, you control both flavor and nutrition.
Step-by-Step: Mixing, Baking, and Storing
Making homemade gluten-free granola bars couldn’t be easier. You only need one big mixing bowl and a lined baking pan. First, combine your oats, seeds, nuts, and dried fruit. In another bowl, whisk together your honey or maple syrup, nut butter, and a splash of vanilla until smooth. Pour the wet ingredients over the dry and stir everything until the mixture is evenly coated—kids love helping at this step, and so do I!
Once mixed, press the mixture firmly into your lined pan. This is key for bars that hold their shape. I use a piece of parchment paper to press everything down as flat as possible. Bake until the bars are set and just golden around the edges, then let them cool completely in the pan before slicing. Gluten-free granola bars keep well for up to a week in an airtight container, and they’re perfect for school lunches, quick breakfasts, or afternoon snacks. You can even wrap individual bars in parchment and freeze them for later, so there’s always a wholesome option waiting when you need it.
Key Ingredients and Gluten-Free Swaps
Rolled oats: Use only certified gluten-free oats.
Sweetener: Honey or maple syrup, whichever your family prefers.
Nut butter: Choose peanut, almond, or sunflower seed butter for a nut-free school-safe version.
Nuts/seeds: Almonds, walnuts, sunflower seeds, or pumpkin seeds.
Dried fruit: Cranberries, raisins, or chopped dates.
Spices and extras: Cinnamon, vanilla extract, and unsweetened coconut.
By keeping these staples on hand, you’re never more than a few minutes away from a batch of homemade, nourishing gluten-free granola bars.
Creative Ways to Customize Your Gluten-Free Granola Bars
Endless Flavor Variations for Every Taste
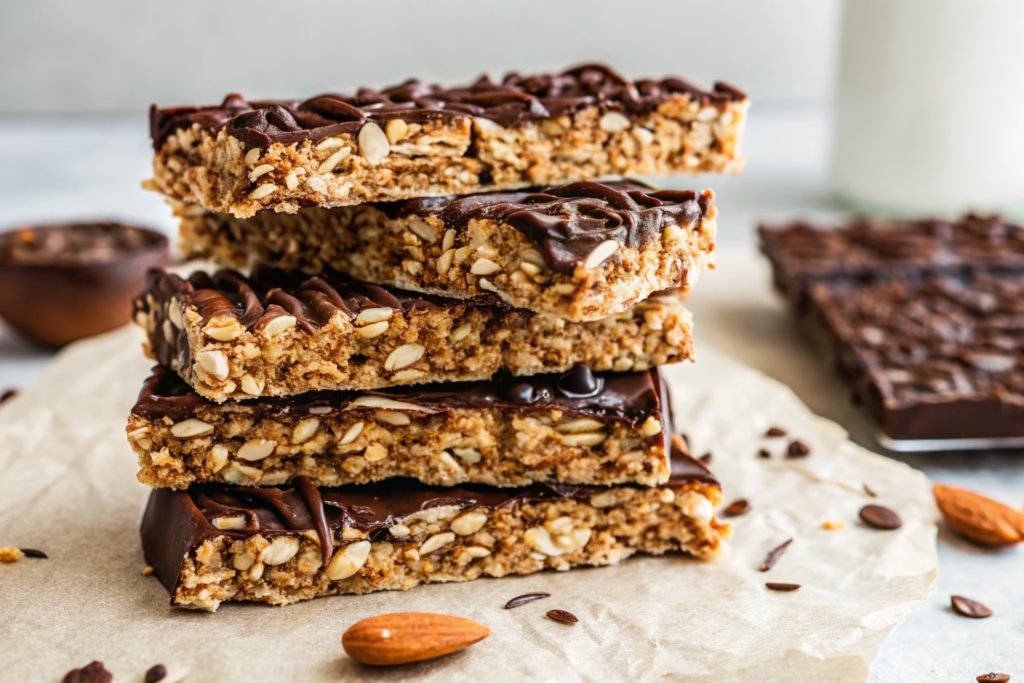
One of my favorite things about gluten-free granola bars is how easy it is to make them your own. You don’t need to stick to one recipe—think of the basic bar as your canvas and get creative with add-ins. Some days, Emily requests mini chocolate chips or a sprinkle of sea salt on top. Other times, Marek prefers a bar loaded with toasted pecans and dried apricots. There’s no wrong way, as long as you keep your ingredients gluten-free.
If you want a bar with extra crunch, try adding puffed rice or quinoa flakes. For a little indulgence, swirl in a few spoonfuls of almond butter and top the bars with dark chocolate drizzle after baking. Craving a tropical flavor? Use chopped dried pineapple, coconut flakes, and macadamia nuts. The options are endless, and you’ll find your family’s favorite combo in no time.
Adapting for Allergies and Special Diets
Homemade gluten-free granola bars are perfect for anyone who needs to avoid common allergens. Nut allergy in your house? Use sunflower seed butter and skip the nuts, loading up on seeds and gluten-free oats instead. If you’re making snacks for a group, go nut-free to be safe for school or daycare. These bars can easily be made dairy-free by sticking to plant-based add-ins—just check your chocolate chips or other packaged ingredients to ensure they’re dairy-free, too.
Vegan? Simply use pure maple syrup instead of honey and a vegan nut butter or seed butter. Want to boost the nutrition even more? Stir in chia seeds, hemp hearts, or flaxseed for extra fiber and omega-3s. The real secret is mixing and matching what you have on hand—each batch can be unique, so you’ll never get bored.
Gluten-Free Granola Bar Flavor Ideas:
Chocolate cherry: mini chocolate chips + dried cherries
Tropical: dried pineapple + coconut flakes + macadamia nuts
Classic peanut butter: peanut butter + raisins + roasted peanuts
Cranberry almond: chopped almonds + dried cranberries
Apricot pecan: dried apricots + toasted pecans + vanilla
Sunflower seed and pumpkin seed for a nut-free version
By making your own gluten-free granola bars, you can skip the bland store-bought options and give your family snacks that are truly tailored to their tastes and needs.
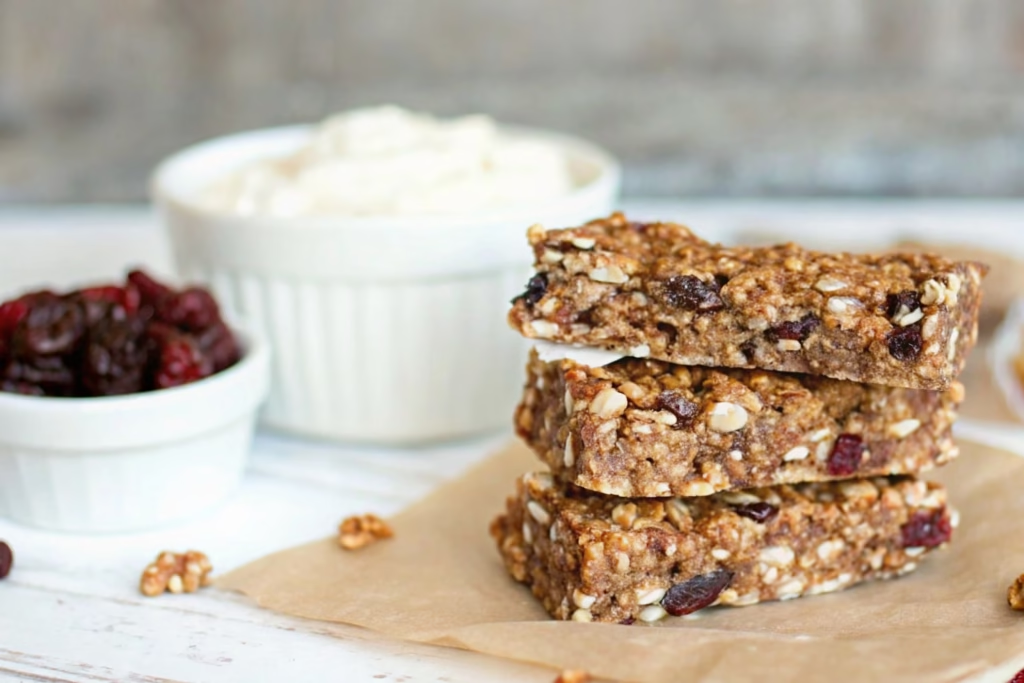
Packing, Serving, and Storing Gluten-Free Granola Bars
Smart Ways to Pack and Serve
Homemade gluten-free granola bars are built for busy families. I love how easily they slip into lunchboxes, backpacks, or even a purse for those days when hunger strikes at the park or between errands. Emily helps wrap bars in parchment or wax paper, and sometimes she adds a handwritten note or doodle, making snack time a little more fun. If you want perfectly shaped bars, use a sharp knife and clean between cuts for neat edges. For bite-sized snacks, cut the bars into small squares and pack them in reusable containers.
When serving at home, pile bars on a pretty plate or tuck them in a snack basket within reach—your family will eat more real food when it’s visible and ready to go. They’re fantastic with a glass of milk after school, crumbled over yogurt for breakfast, or packed as a post-gym energy boost for grown-ups. We even take them on road trips or picnics because they don’t crumble or melt like some snacks.
Keeping Bars Fresh: Storage Tips
Storing gluten-free granola bars the right way keeps them soft, chewy, and full of flavor. Once cooled and cut, I store bars in an airtight container with parchment between layers to keep them from sticking. At room temperature, they’ll stay fresh for up to a week. If your house is warm, pop the container in the fridge for longer shelf life—the bars stay a little firmer but are just as delicious.
For extra convenience, wrap individual bars and freeze them. Pull one out in the morning, and it’ll be thawed and ready by snack time. This trick has saved me on busy days more times than I can count. And because these bars freeze so well, you can double the batch and always have a homemade, gluten-free treat on hand.
Why Homemade Wins
Making gluten-free granola bars at home means you know every ingredient. You avoid hidden gluten, excess sugar, and preservatives. Each bar is made with care for the people you love—whether that’s your child with a food sensitivity, your partner needing a midday boost, or yourself, savoring a well-earned break with a cup of coffee.
Homemade snacks bring a sense of comfort and accomplishment. They make mornings smoother and afternoons happier. And in our house, they always come with a little story and a lot of heart.
PrintGluten-Free Granola Bars: A Crunchy, Wholesome Snack for Every Family
Homemade Gluten-Free Granola Bars are the ultimate snack for busy families—chewy, crisp, and perfectly sweet, with wholesome ingredients and a heartwarming story behind every batch. These bars are naturally gluten-free, easy to customize, and packed with flavor for breakfast, lunchboxes, or on-the-go energy.
- Prep Time: 10 minutes
- Cook Time: 20 minutes
- Total Time: 30 minutes
- Yield: 12 bars 1x
- Category: Snack
- Method: Baked
- Cuisine: American
Ingredients
- 2 cups certified gluten-free rolled oats
- 1/2 cup raw sunflower seeds (or pumpkin seeds)
- 1/2 cup slivered or chopped almonds (or use more seeds for nut-free)
- 1/2 cup unsweetened coconut flakes
- 1/2 cup dried cranberries, raisins, or chopped dates
- 1/2 teaspoon cinnamon
- 1/4 teaspoon sea salt
- 1/2 cup honey or pure maple syrup
- 1/2 cup nut or seed butter (peanut, almond, or sunflower seed butter)
- 1 teaspoon vanilla extract
Instructions
- Preheat your oven to 350°F (175°C). Line an 8×8-inch baking pan with parchment paper, letting the edges hang over for easy removal.
- In a large bowl, combine the oats, seeds, almonds, coconut flakes, dried fruit, cinnamon, and salt. Stir to mix.
- In a separate bowl, whisk together the honey (or maple syrup), nut or seed butter, and vanilla until smooth.
- Pour the wet mixture over the dry ingredients and stir until everything is evenly coated. Kids can help at this step!
- Transfer the mixture to your prepared pan. Using a sheet of parchment, press the mixture down very firmly and evenly into the corners.
- Bake for 18–22 minutes, until the edges are just turning golden brown.
- Let the bars cool completely in the pan, then lift out using the parchment. Slice into bars or squares with a sharp knife, cleaning between cuts for neat edges.
- Store bars in an airtight container with parchment between layers for up to 1 week, or freeze individually wrapped bars for longer storage.
Notes
For nut-free granola bars, use sunflower or pumpkin seed butter and skip the nuts—perfect for school-safe and allergy-friendly snacks. Mix and match dried fruits, nuts, and seeds to suit your family’s favorites. To help bars hold together, be sure to press the mixture very firmly into the pan and let them cool before slicing.
Nutrition
- Serving Size: 1 bar
- Calories: 180
- Sugar: 8g
- Sodium: 60mg
- Fat: 8g
- Saturated Fat: 2g
- Unsaturated Fat: 5g
- Trans Fat: 0g
- Carbohydrates: 24g
- Fiber: 3g
- Protein: 4g
- Cholesterol: 0mg
FAQ: Gluten-Free Granola Bars
Are all oats gluten-free?
Not all oats are gluten-free. While oats are naturally gluten-free, they’re often processed in facilities that also handle wheat, barley, or rye, risking cross-contamination. Always buy oats labeled “certified gluten-free” to keep your granola bars safe for anyone with celiac disease or gluten sensitivity.
Can I make gluten-free granola bars without nuts?
Absolutely. For a nut-free version, swap nut butters for sunflower seed or pumpkin seed butter. Load up on seeds, gluten-free oats, and your favorite dried fruit. This is a great way to make bars that are school-safe and allergy-friendly.
How do I keep homemade gluten-free granola bars from falling apart?
The secret is to press the mixture very firmly into the pan before baking. Using enough sticky sweetener—like honey or maple syrup—also helps the bars hold together. Let the bars cool completely in the pan before cutting; this makes a big difference in texture and shape.
Can I freeze gluten-free granola bars?
Yes, these bars freeze beautifully. Wrap them individually in parchment or wax paper, store them in a freezer-safe container or bag, and you’ll always have a snack ready to go. They thaw quickly at room temperature, making them perfect for busy mornings or last-minute cravings.
Conclusion
Gluten-free granola bars are so much more than a snack—they’re a celebration of home, family, and the little rituals that make life sweeter. Whether you’re packing a lunchbox, fueling a busy day, or sharing a homemade treat at the kitchen table, these bars bring comfort and joy in every bite. When you bake them yourself, you give your loved ones the gift of wholesome ingredients, real flavors, and a recipe that’s as flexible as it is delicious.
👉 I hope you loved making these Gluten-Free Granola Bars—they’re wholesome, chewy, and perfect for breakfast on-the-go or a midday snack for the whole family.
If you’re searching for more gluten-free delights, be sure to try our Gluten-Free Greek Quinoa Salad, packed with protein and fresh Mediterranean flavors. For a fun, no-bake treat, our No-Bake Chocolate Chip Cookie Dough Bars are another gluten-free favorite.
Need something sweet to round out your snack stash? Check out our French Strawberry Tart or the easy, shareable Strawberry Cheesecake Bites.
For more healthy and easy snack inspiration, try this protein-packed Lemon Poppy Seed Almond Flour Pancakes over at SANTMD, or check out their Cottage Cheese Blueberry Muffins for a fun twist on breakfast.
If you’re interested in discovering new ways to enjoy oats and healthy snacks, be sure to browse this delicious Honey Banana Oat Cake Recipe on Danarecipes, or their easy and hearty Baked Oatmeal with Apples and Cinnamon.
Feel free to join us on our Facebook Page and Facebook Group for updates and community engagement. Don’t forget to check out our Pinterest.


