
Introduction
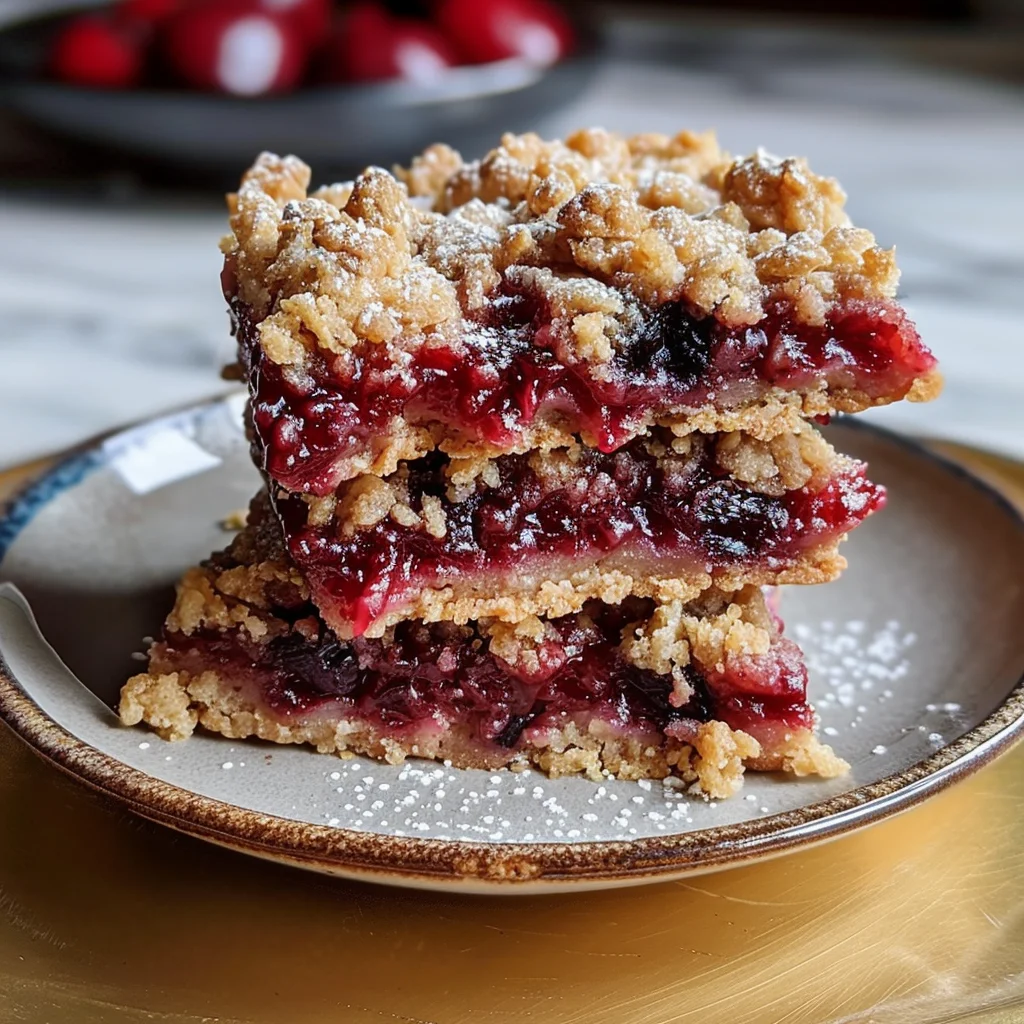
There are some flavors that just wrap their arms around you and refuse to let go. For me, that’s the magic of these cherry crumble bars. I can still picture my babcia’s kitchen in Chicago, the smell of butter and sugar filling the air as she’d pull a pan of golden, bubbling fruit bars from the oven. She never used a recipe, of course—just a handful of this, a pinch of that, and a whole lot of love. Now, as a mom to Ella and Peter, I love recreating that feeling in my own kitchen, especially with a tart cherry filling that reminds me of the sour cherries my grandmother would preserve every summer. These bars are my little tribute to her, and honestly, they taste like a warm hug on a plate.
These aren’t just any dessert; they’re the perfect balance of a buttery, crumbly shortbread crust and a sweet-tart cherry filling that’s bursting with flavor. Whether you use fresh, frozen, or canned cherries, this recipe is forgiving, foolproof, and absolutely delicious. They’re the kind of treat that disappears in minutes at a family gathering, and I’m so excited to share my version with you. So, grab your apron, and let’s make some memories—and some seriously good cherry crumble bars.
Why You’ll Love This Cherry Crumble Bars Recipe
Oh, where do I even begin? These cherry crumble bars are everything you could want in a dessert. First off, they’re incredibly easy to make, even for beginner bakers. The crust and crumble topping come from the same simple dough, which means less mess and less fuss. Plus, they’re made with simple, pantry-friendly ingredients that you probably already have on hand.
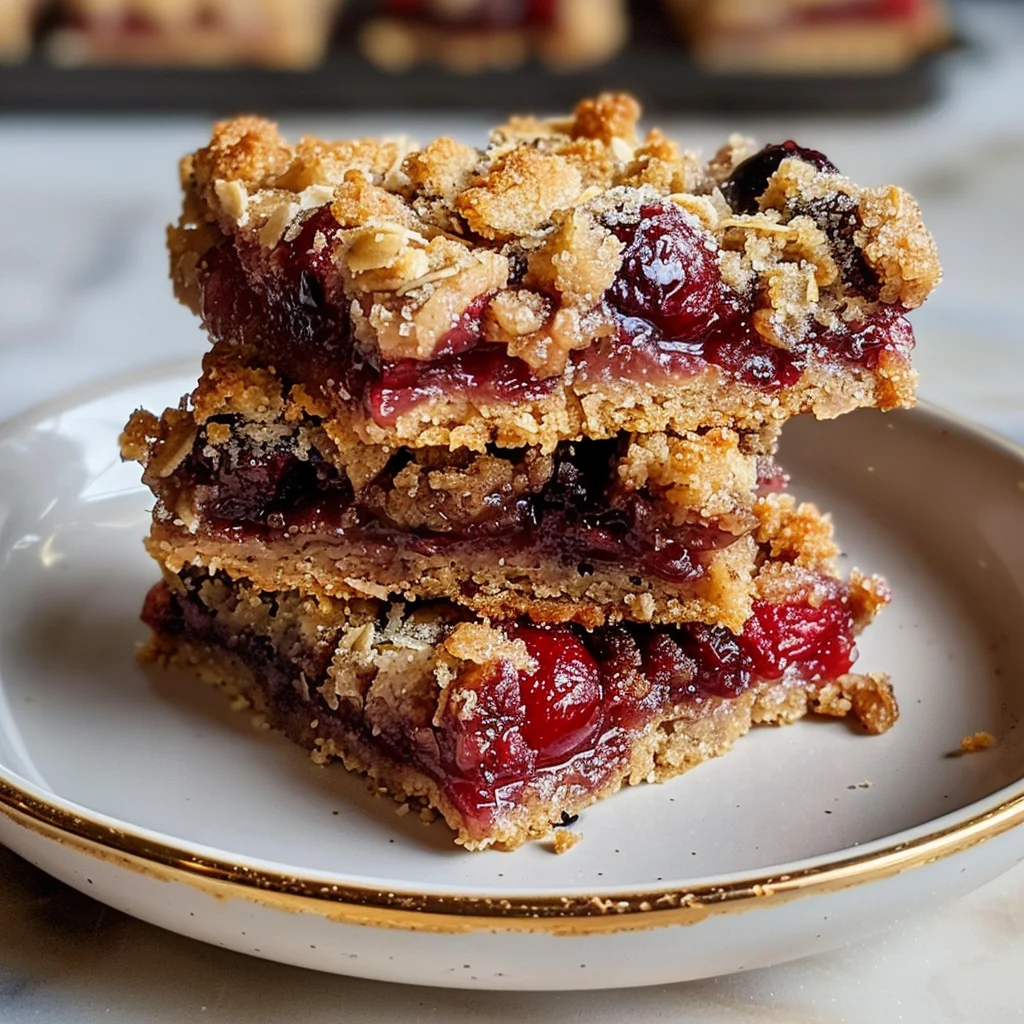
But the real star of the show is the flavor. The buttery, slightly sweet crust is the perfect contrast to the bright, tangy cherry filling. It’s a flavor combination that’s both nostalgic and exciting. And let’s not forget the texture—you get a crisp, crumbly topping, a soft and chewy crust, and a jammy, gooey center. It’s a symphony of textures in every single bite. These bars are also incredibly versatile. They’re perfect for a summer picnic, a holiday cookie swap, or just a Tuesday night treat with a scoop of vanilla ice cream.
Ingredients for the Perfect Cherry Crumble Bars
Here’s what you’ll need to create these beauties. I’ve included some notes to help you customize them to your liking.
For the Crust and Crumble Topping:
- 2 cups (250g) all-purpose flour: The base of our buttery crust. For a gluten-free version, you can use a 1:1 gluten-free baking flour blend.
- 1 cup (200g) granulated sugar: Adds sweetness to balance the tart cherries.
- 1 teaspoon baking powder: Gives the crust a little lift, making it tender.
- 1/2 teaspoon salt: Enhances all the flavors.
- 1 cup (2 sticks or 226g) cold, unsalted butter, cubed: This is key! Cold butter creates a flaky, tender texture. If you only have salted butter, just reduce the added salt to 1/4 teaspoon.
- 1 large egg, lightly beaten: Helps bind the dough together.
- 1/2 teaspoon vanilla extract: For that warm, aromatic flavor.
For the Cherry Filling:
- 4 cups (about 600g) pitted cherries: Fresh or frozen both work wonderfully. If using frozen, there’s no need to thaw them first. Canned cherries (drained) are also a great option in a pinch.
- 1/2 cup (100g) granulated sugar: Adjust this based on the sweetness of your cherries. If they’re very sweet, you might want to use a little less.
- 2 tablespoons cornstarch: This acts as a thickener to create that perfect jammy filling.
- 1 tablespoon lemon juice: Brightens up the cherry flavor and adds a little zing.
- 1/2 teaspoon almond extract (optional but highly recommended): Almond and cherry are a match made in heaven! It adds a beautiful, nutty depth of flavor.
Step-by-Step Instructions: How to Make Cherry Crumble Bars
Alright, let’s get baking! This process is simple and so rewarding.
- Prep and Preheat: First things first, preheat your oven to 375°F (190°C). Line a 9×13-inch baking pan with parchment paper, leaving some overhang on the sides. This will make it super easy to lift the bars out later.
- Make the Crust Dough: In a large bowl, whisk together the flour, sugar, baking powder, and salt. Now, add the cold, cubed butter. Using a pastry blender or your fingertips, work the butter into the dry ingredients until the mixture resembles coarse crumbs. It’s okay if there are some pea-sized butter pieces—that’s what makes it flaky! Next, add the beaten egg and vanilla extract. Stir with a fork until the dough just starts to come together. Don’t overmix!
- Press the Crust: Take about two-thirds of the dough (roughly 2/3 of the mixture) and press it evenly into the bottom of your prepared pan. Make sure it’s packed down firmly and goes all the way to the edges. This is your bottom crust.
- Bake the Crust: Pop the crust into the preheated oven and bake for about 15 minutes, or until it’s lightly golden. This par-baking step ensures the bottom crust doesn’t get soggy from the cherry filling.
- Prepare the Cherry Filling: While the crust is baking, make the filling. In a medium saucepan, combine the cherries, sugar, cornstarch, lemon juice, and almond extract (if using). Cook over medium heat, stirring frequently, until the mixture comes to a simmer and thickens. This should take about 5-7 minutes. You’ll know it’s ready when the juices have become glossy and syrupy.
- Assemble the Bars: Once the crust is done, remove it from the oven. Pour the warm cherry filling evenly over the hot crust, spreading it out with a spatula.
- Add the Crumble Topping: Take the remaining third of the dough and crumble it over the top of the cherry filling. You want to create a nice, even layer of crumbles—some big, some small.
- Bake to Golden Perfection: Return the pan to the oven and bake for another 25-30 minutes, or until the topping is golden brown and the filling is bubbly around the edges.
- Cool Completely: This is the hardest part—patience! You absolutely must let the bars cool completely in the pan on a wire rack before you cut into them. This allows the filling to set properly. If you cut them while they’re warm, they’ll be a gooey mess (still delicious, but messy!). Once completely cool, use the parchment paper to lift the whole slab out, and cut into squares.
Expert Tips for Perfect Cherry Crumble Bars
I’ve made these bars more times than I can count, and I’ve learned a few things along the way. Here are my top tips for getting them just right:
- Keep Everything Cold: For the flakiest crust, your butter and egg must be cold. If the butter gets too warm, the dough will become tough. If your kitchen is warm, you can even pop the cut-up butter in the freezer for 10 minutes before you start.
- Don’t Overmix the Dough: Mix just until the dough comes together. Overworking the gluten will result in a tough, chewy crust instead of a tender, crumbly one.
- Par-Bake the Crust: This is non-negotiable for a crisp bottom layer. It prevents the crust from becoming soggy from the juicy cherry filling.
- Thicken Your Filling: Don’t skip the cornstarch! It’s what turns the cherry juice into a luscious, jammy filling instead of a runny mess.
- Be Patient with Cooling: I know it’s tempting to dig in right away, but letting the bars cool completely is crucial for clean, neat slices. If you’re in a hurry, you can pop the pan in the fridge for about 30 minutes to speed up the process.
Variations and Substitutions
One of the best things about this recipe is how adaptable it is. Here are some fun ways to switch it up:
- Berry Bliss: Swap the cherries for an equal amount of blueberries, raspberries, or blackberries. A mixed berry version is also amazing!
- Stone Fruit Swap: Diced peaches, nectarines, or plums would be a fantastic summer twist.
- Gluten-Free: Use a high-quality 1:1 gluten-free flour blend in place of the all-purpose flour. No other changes are needed.
- Add Some Spice: Add a pinch of cinnamon or nutmeg to the crumble topping for a warm, cozy flavor.
- Nutty Crunch: Mix 1/2 cup of chopped pecans or walnuts into the crumble topping for added texture.
- Lemon Zest: Add a teaspoon of lemon zest to the crust dough for a bright, citrusy note.
Serving Suggestions
These cherry crumble bars are perfect on their own, but they’re truly elevated with a few simple additions. Here’s how I love to serve them:
- The Classic: Serve a warm (or room temperature) bar with a generous scoop of vanilla bean ice cream. The cold, creamy ice cream against the warm, buttery bar is pure heaven.
- A Dollop of Cream: A spoonful of lightly sweetened whipped cream or a drizzle of heavy cream is a simple and elegant touch.
- With Your Morning Coffee: These bars are fantastic with a cup of coffee or tea. They’re not too sweet, so they make a wonderful breakfast treat or mid-day snack.
- For Dessert: Serve them on a beautiful platter dusted with powdered sugar for a stunning presentation at any gathering.
Frequently Asked Questions (FAQs)
Can I use frozen cherries?
Absolutely! In fact, frozen cherries are a great option, especially when fresh ones aren’t in season. You can use them straight from the freezer—no need to thaw them first. Just add a few extra minutes to the cooking time for the filling.
Can I use canned cherry pie filling?
Yes, you can use a 21-ounce can of cherry pie filling as a shortcut. In this case, you can skip the step of cooking the filling on the stovetop and just spread the pie filling directly over the par-baked crust.
How do I store cherry crumble bars?
Store any leftovers in an airtight container in the refrigerator for up to 5 days. They’re delicious cold, or you can reheat them in the microwave for a few seconds to warm them up.
Can I freeze these bars?
Yes, they freeze beautifully! Once the bars are completely cool, cut them into squares and place them in a single layer on a baking sheet. Freeze for about an hour, then transfer the frozen bars to a freezer-safe bag or container. They can be frozen for up to 3 months. Thaw in the refrigerator or at room temperature before serving.
Why is my filling runny?
If your filling is runny, it’s likely that it wasn’t cooked long enough to activate the cornstarch. Make sure you cook the filling until it has visibly thickened and become glossy. Also, ensure the bars are completely cooled before cutting, as the filling will continue to set as it cools.
Can I make these in an 8×8 pan?
Yes, you can! If you use an 8×8-inch pan, the bars will be thicker. You’ll need to increase the baking time for the crust and the final bake by about 5-10 minutes. Just keep an eye on them to ensure they don’t over-brown.
Final Thoughts
These cherry crumble bars are more than just a dessert to me. They’re a little piece of my childhood, a taste of my family’s love, and a reminder that the best things in life are often the simplest. Whether you’re baking them for a special occasion or just because it’s Tuesday, I hope they bring you as much joy as they bring me. They’re sweet, tart, buttery, and absolutely unforgettable. So go ahead, preheat that oven, and get ready to fill your home with the most incredible aroma. Happy baking, friends!
👉 I hope you loved making these cherry crumble bars—they’re buttery, fruity, and just the kind of comforting dessert that makes any day feel a little more special. If you’re looking for more sweet treats to fill your kitchen with that same cozy feeling, you should definitely check out some of my other favorites. For another fruity delight, try these Blueberry Crumble Bars for a twist on a classic. If you’re in the mood for something chocolatey, these Fudgy Brownie Bites are pure perfection. And for a taste of my Polish heritage, you can’t go wrong with this Classic Polish Apple Cake—it’s my babcia’s recipe and an absolute family treasure. For a quick and easy weeknight dessert, these No-Bake Peanut Butter Bars are a lifesaver. Join us on our Facebook Page and Facebook Group — and don’t forget to follow on Pinterest for daily inspiration!
Main Course · American · Medium
Kid-Friendly Cherry Crumble Bars
Buttery, crumbly shortbread bars filled with a sweet-tart cherry jam filling. An easy, crowd-pleasing dessert perfect for any occasion.
Keep the screen of your device on while you follow the steps.
- Preheat oven to 375°F (190°C). Line a 9×13-inch pan with parchment paper.
- Whisk flour, sugar, baking powder, and salt in a large bowl.
- Cut cold butter into the flour mixture until it resembles coarse crumbs.
- Stir in the beaten egg and vanilla extract until the dough just comes together.
- Press two-thirds of the dough into the bottom of the prepared pan.
- Bake the crust for 15 minutes, until lightly golden.
- Combine cherries, sugar, cornstarch, lemon juice, and almond extract in a saucepan.
- Cook the cherry mixture over medium heat until it thickens and becomes glossy.