Table of Contents
Introduction
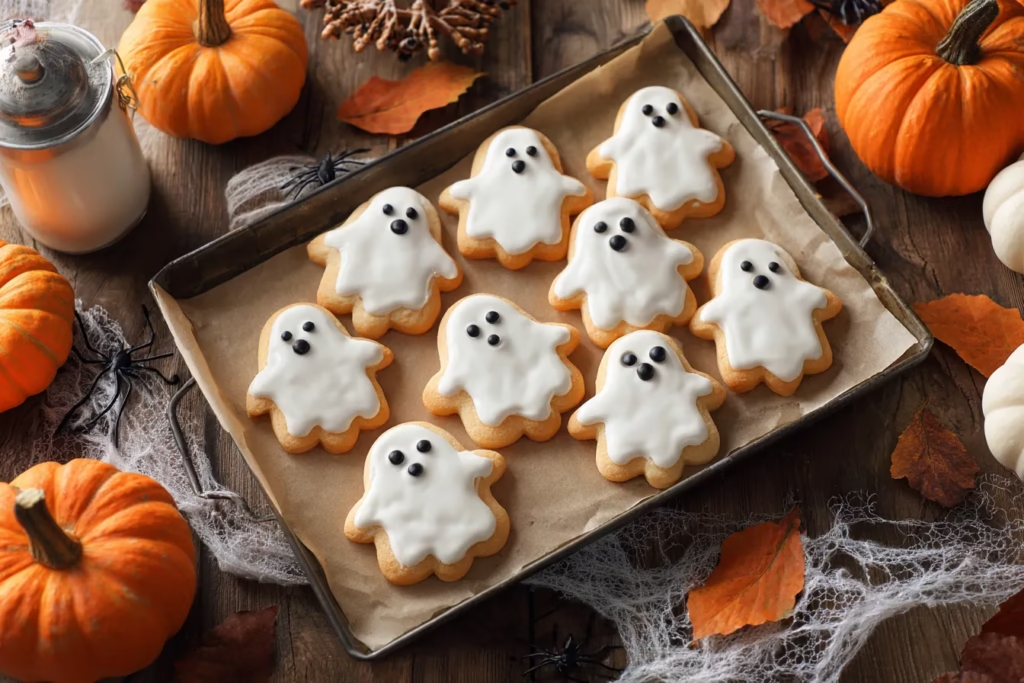
Ghost Sugar Cookies with Royal Icing are the perfect mix of cute and spooky, making them a must-have for Halloween celebrations. With their soft, buttery base and smooth, glossy icing, these cookies are as fun to decorate as they are to eat. Whether you keep the design simple or go for elaborate ghostly details, they’re guaranteed to be a hit with kids and adults alike. You can make them in advance, customize each one’s expression, and serve them as party treats or edible gifts. In under an afternoon, you’ll have a batch of sweet little ghosts ready to haunt your dessert table.
Ghost Sugar Cookies with Royal Icing – Sweet, Spooky, and Irresistible
How a Family Halloween Tradition Began with Ghost Sugar Cookies
Every October, our New York kitchen transforms into a cozy Halloween workshop. The counters fill with bowls of frosting, cooling racks, and the sweet aroma of buttery sugar cookies baking in the oven. Ghost Sugar Cookies with Royal Icing have been our signature treat for years — a tradition that began when Emily was just a toddler. She’d stand on a chair beside me, gripping a piping bag almost as big as her arm, determined to give each ghost a “happy scary” face. Marek would sneak into the kitchen, swiping a cookie before it even had its icing, while my mom, Elizabeth, would smile and remind me how my Yiayia in Kalymnos used to make holiday cookies with the same love (hers dusted in cinnamon sugar instead of white icing).
Why Royal Icing Makes These Cookies So Special
There’s something magical about Ghost Sugar Cookies with Royal Icing. The cookies are soft yet sturdy enough to hold their shape, while the icing dries to a smooth, glossy finish that turns each one into a tiny edible work of art. Ghosts can be silly, spooky, or even elegant depending on your mood — and unlike store-bought treats, these carry the warmth of a homemade gift. Perfect for school parties, neighborhood gatherings, or simply adding a festive touch to your dessert table, they’re as much about the experience as the final result. In our home, decorating them is half the fun. Emily loves giving each ghost a unique personality, and sometimes we end up with a whole “ghost family” lined up, patiently waiting for their icing to set. These cookies aren’t just Halloween sweets — they’re a slice of our family tradition.

How to Make Ghost Sugar Cookies Step-by-Step
Choosing the Best Sugar Cookie Dough for Perfect Shapes
The key to beautiful Ghost Sugar Cookies with Royal Icing is a dough that holds its shape when baked. A classic cut-out sugar cookie recipe works best — buttery, slightly sweet, and sturdy enough for decorating. Chilling the dough before cutting is essential; it prevents spreading in the oven and keeps your ghost shapes crisp. Roll the dough to about ¼ inch thick for a balance of softness and structure. Use a ghost-shaped cookie cutter and dip it in flour between cuts to prevent sticking. Transfer the cookies to a parchment-lined baking sheet, then chill them again for 10–15 minutes before baking. This second chill helps the cookies keep their clean edges.
Basic Ingredients:
- 2 ¾ cups all-purpose flour
- 1 tsp baking powder
- ½ tsp salt
- 1 cup unsalted butter, softened
- 1 cup granulated sugar
- 1 large egg
- 2 tsp vanilla extract
Bake at 350°F (175°C) for 8–10 minutes or until the edges are just set. Let the cookies cool completely before decorating.
Mixing and Coloring Royal Icing for Ghostly Effects
Royal icing is what gives these cookies their smooth, glossy ghost finish. You’ll need powdered sugar, meringue powder, and water — whisk until you have a thick but pipeable consistency. For a classic ghost look, keep the icing white and set aside a small portion tinted black for eyes and mouths.
Outline each ghost with slightly thicker icing, then flood the inside with a thinner version for a smooth surface. Use a toothpick to nudge icing into corners and pop air bubbles. Add facial features once the base has crusted slightly but not fully hardened — this ensures the details sit neatly on the surface. Allow the cookies to dry at room temperature for several hours or overnight before stacking or packaging.

Decorating Ideas for Ghost Sugar Cookies
Fun and Easy Designs for Beginners
You don’t need advanced piping skills to make adorable Ghost Sugar Cookies with Royal Icing. Start with a simple white icing base, then add two black dots for eyes and one for the mouth — instant friendly ghost. For a cheekier look, tilt the eyes slightly or add rosy cheeks using a dab of pink food coloring. If kids are helping, give them squeeze bottles instead of piping bags for better control. You can also sprinkle a little edible glitter over the wet icing for a magical shimmer.
A fun party idea is to set up a “cookie decorating station” with bowls of royal icing in different colors, mini candy eyes, and edible markers so guests can create their own ghost characters.
Advanced Details for Professional-Looking Ghosts
If you want your Ghost Sugar Cookies with Royal Icing to look bakery-perfect, focus on layering details. After flooding the base, let it dry completely before adding a second layer for dimension, like a scarf, bow tie, or witch hat. Use a very fine piping tip for tiny lines and facial expressions, and experiment with shading by adding diluted food coloring to dry icing for a watercolor effect.
For a spooky twist, pipe little spiderwebs or “boo!” messages in contrasting colors. Metallic edible paint can also give your ghosts a sophisticated touch — perfect for upscale Halloween dessert tables. The key is patience: letting each layer dry before adding the next will keep the details sharp and prevent bleeding colors.

Serving and Storing Ghost Sugar Cookies
How to Display Them for Parties and Gifts
Presentation makes Ghost Sugar Cookies with Royal Icing even more charming. Arrange them on a black or orange cake stand for a Halloween table centerpiece, or place them on a large wooden board surrounded by mini pumpkins and festive candles. For school parties, wrap each cookie in a clear cellophane bag tied with a ribbon — it keeps them fresh and makes them easy to hand out.
If you’re hosting a Halloween dessert table, display cookies in small groups with decorative name tags like “Boo Crew” or “Ghost Gang.” For gifts, layer cookies between parchment sheets in a bakery box, then tie with twine for a rustic look.
Storing and Maintaining Freshness Without Cracking Icing
Once decorated, allow Ghost Sugar Cookies with Royal Icing to dry completely before storing — usually 8–12 hours at room temperature. Store them in an airtight container with parchment or wax paper between layers to prevent sticking. Keep them in a cool, dry place for up to one week.
For longer storage, you can freeze the undecorated cookies for up to two months. When ready to decorate, thaw them at room temperature before adding royal icing. Avoid freezing fully decorated cookies unless absolutely necessary, as condensation can cause the icing colors to run.
If you need to transport them, place each cookie in a small plastic sleeve or wrap loosely in parchment, then pack in a rigid container with bubble wrap between layers. This keeps your ghosts safe and looking perfect when they reach their destination.
Print
Ghost Sugar Cookies with Royal Icing – Fun and Festive Halloween Treats
- Total Time: 40 minutes + chilling
- Yield: 24 cookies 1x
- Diet: Vegetarian
Description
Soft, buttery sugar cookies shaped like friendly ghosts, topped with smooth, glossy royal icing for the perfect spooky-sweet Halloween treat.
Ingredients
- 2 ¾ cups all-purpose flour
- 1 tsp baking powder
- ½ tsp salt
- 1 cup unsalted butter, softened
- 1 cup granulated sugar
- 1 large egg
- 2 tsp vanilla extract
- 4 cups powdered sugar
- 3 tbsp meringue powder
- 9–10 tbsp water
- Black food coloring (for eyes/mouths)
Instructions
- In a medium bowl, whisk together flour, baking powder, and salt. Set aside.
- In a large bowl, beat butter and sugar until light and fluffy. Add egg and vanilla; mix until combined.
- Gradually add dry ingredients, mixing until dough forms. Divide in half, wrap in plastic, and chill for at least 1 hour.
- Preheat oven to 350°F (175°C). Roll dough to ¼ inch thick. Cut ghost shapes with a cookie cutter, dipping cutter in flour between cuts.
- Place cookies on parchment-lined baking sheets. Chill again for 10–15 minutes.
- Bake 8–10 minutes, until edges are just set. Cool completely before decorating.
- To make royal icing, whisk powdered sugar, meringue powder, and water until thick but pipeable. Tint a small portion black for faces.
- Outline ghosts with thicker icing, then flood with thinner icing. Use a toothpick to spread icing and pop bubbles.
- Add eyes and mouths once the base icing is partially set. Let cookies dry several hours or overnight before stacking or packaging.
Notes
Chilling dough twice prevents spreading. Use squeeze bottles for kid-friendly decorating. Avoid freezing decorated cookies unless fully necessary to prevent icing damage.
- Prep Time: 30 minutes
- Cook Time: 10 minutes
- Category: Dessert
- Method: Baking
- Cuisine: American
Nutrition
- Serving Size: 1 cookie
- Calories: 150
- Sugar: 15g
- Sodium: 65mg
- Fat: 6g
- Saturated Fat: 4g
- Unsaturated Fat: 2g
- Trans Fat: 0g
- Carbohydrates: 22g
- Fiber: 0g
- Protein: 2g
- Cholesterol: 20mg
FAQs about Ghost Sugar Cookies with Royal Icing
1. Can I make Ghost Sugar Cookies ahead of time?
Yes. You can bake and cool the cookies up to 3 days in advance, then store them in an airtight container until you’re ready to decorate.
2. How do I get royal icing smooth and shiny?
Use the flood consistency icing for filling the cookie surface, and pop any air bubbles with a toothpick immediately after flooding. Allow the cookies to dry in a cool, draft-free space.
3. Can I freeze decorated sugar cookies?
It’s possible, but not ideal. Fully dry the icing, wrap each cookie in plastic, and store in a rigid container. Thaw at room temperature without unwrapping to reduce condensation.
4. What’s the best way to keep the cookies from spreading?
Chill the dough before cutting shapes and again before baking. Avoid overmixing, which can cause spreading.
Conclusion
Ghost Sugar Cookies with Royal Icing bring a perfect mix of sweetness and spooky charm to your Halloween celebrations. From the buttery, crisp-edged cookies to the glossy, personality-filled ghosts, they’re a treat that delights kids and adults alike. Whether you keep the designs simple or go all out with layered details and shimmering finishes, each batch is a chance to create edible art and share a piece of homemade joy. In our home, these cookies aren’t just desserts — they’re part of the season’s tradition, making October feel just a little more magical
👉 I hope you loved baking up these Ghost Sugar Cookies with Royal Icing—they’re sweet, spooky, and the perfect edible decoration for your Halloween table. Crisp on the outside, soft in the middle, and topped with a glossy royal icing finish, these little ghosts are as fun to make as they are to eat.
If you’re looking for more treat ideas, our French Strawberry Tart is a fruity, elegant dessert perfect for year-round celebrations. For a no-bake option, try our Edible Chocolate Chip Cookie Dough for One—perfect for when you just need a little indulgence.
Pair your ghost cookies with a fall favorite like our Slow Cooker Lasagna Soup for a cozy dinner before dessert. Or keep the Halloween spirit alive with another fun bite, like Strawberry Cheesecake Bites.
For more baking fun, check out Salted Caramel Cupcakes from SANTMD—rich, decadent, and perfect for autumn gatherings. Or head to Danarecipes for Easy Lemon Shortbread Cookies, a buttery, zesty treat that’s great for any season.
Feel free to join us on our Facebook Page and Facebook Group for updates and community engagement. Don’t forget to check out our Pinterest for more recipe inspiration all year round.

